Easy Christmas Sugar Cookie Recipe for Rolling and Cutting
This blog post may contain affiliate links.
There’s something special about baking sugar cookies at Christmas. They’re a holiday tradition in so many homes. The best part? Rolling out the dough, cutting festive shapes, and decorating them with family or friends. These cookies aren’t just delicious—they’re a memory waiting to happen. Ready to make your own? Let’s get started.
Ingredients Needed
Having the right ingredients is key when making Christmas sugar cookies to roll and cut. These cookies rely on simple pantry staples, but a few optional extras can take them to the next level. Here’s everything you need.
Basic Ingredients
For the base of your sugar cookies, you’ll use classic ingredients that most kitchens have on hand. These are the essentials:
- All-purpose flour: The backbone of your dough. It gives the cookies their structure.
- Granulated sugar: Provides sweetness and helps the cookies achieve that golden finish.
- Unsalted butter (softened): Adds richness and ensures a smooth, crumbly texture.
- Eggs: These bind the dough together and give the cookies their slight chew.
- Vanilla extract: Infuses the cookies with a warm, sweet flavor that feels festive.
- Baking powder: A leavening agent that helps the cookies hold their shape as they bake.
Gather these ingredients, and you’ll be set for a reliable, delicious sugar cookie dough.
Optional Ingredients
Want to make your cookies extra special? Try these optional decorations and toppings to showcase your creativity:
- Sprinkles: Add a pop of color and fun. Perfect for kids (and adults) who love festive flair.
- Colored sugar: For a simpler look, sprinkle it over the cookies before or after baking.
- Frosting or royal icing: Use it to create intricate designs, or just spread it for a smooth, shiny finish.
These extras let you customize your cookies and make them as bright and festive as you’d like! Whether you prefer bold colors or delicate designs, there’s an option for everyone.
Preparation Steps
Nothing beats a well-prepped base for creating flawless Christmas sugar cookies. With these simple steps, you’ll ensure your dough is ready for rolling, cutting, and baking festive perfection.
Making the Dough
The key to great sugar cookies starts with a smooth, consistent dough. Follow these steps to get it just right:
- Cream butter and sugar: In a large mixing bowl, combine softened unsalted butter and granulated sugar. Use a hand or stand mixer at medium speed until the mixture appears pale and fluffy. This step ensures your cookies will be light and tender.
- Add eggs and vanilla: Crack eggs into the bowl one at a time, mixing thoroughly after each addition. Stir in pure vanilla extract for a hit of nostalgic sweetness. Pro tip: Scrape down the sides of the bowl occasionally so everything combines evenly.
- Mix in dry ingredients: In a separate bowl, whisk together all-purpose flour, baking powder, and a pinch of salt. Slowly add the dry mixture to the wet ingredients, mixing on low speed until just combined. Avoid overmixing—this helps maintain the dough’s soft texture.
Once your dough comes together, it should be smooth but not sticky. If it feels too soft, don’t worry—that’s where the next step comes in!
Chilling the Dough
Chilling the dough isn’t just an extra step; it’s the secret to cookies that roll and cut like a dream. Here’s why it matters:
- Firms up the dough: Warm dough can be too soft, making it hard to handle and causing your shapes to stretch or tear. Chilling allows the butter to solidify, creating a more manageable consistency.
- Prevents spreading: Butter that’s too soft can lead to cookies spreading too much in the oven. A chilled dough holds its shape better during baking.
- Improves flavor: Letting the dough rest in the fridge allows the flavors to meld, resulting in richer, more developed cookies.
To chill, divide the dough into two discs about an inch thick. Wrap each tightly in plastic wrap and refrigerate for 1-2 hours. If you’re in a hurry, popping it in the freezer for 20-30 minutes works, too.
When you’re ready to roll, let the dough sit at room temperature for a few minutes to soften slightly. This makes it easier to work with while still retaining its chill. Get ready for crisp edges and perfect shapes!
Rolling and Cutting the Cookies
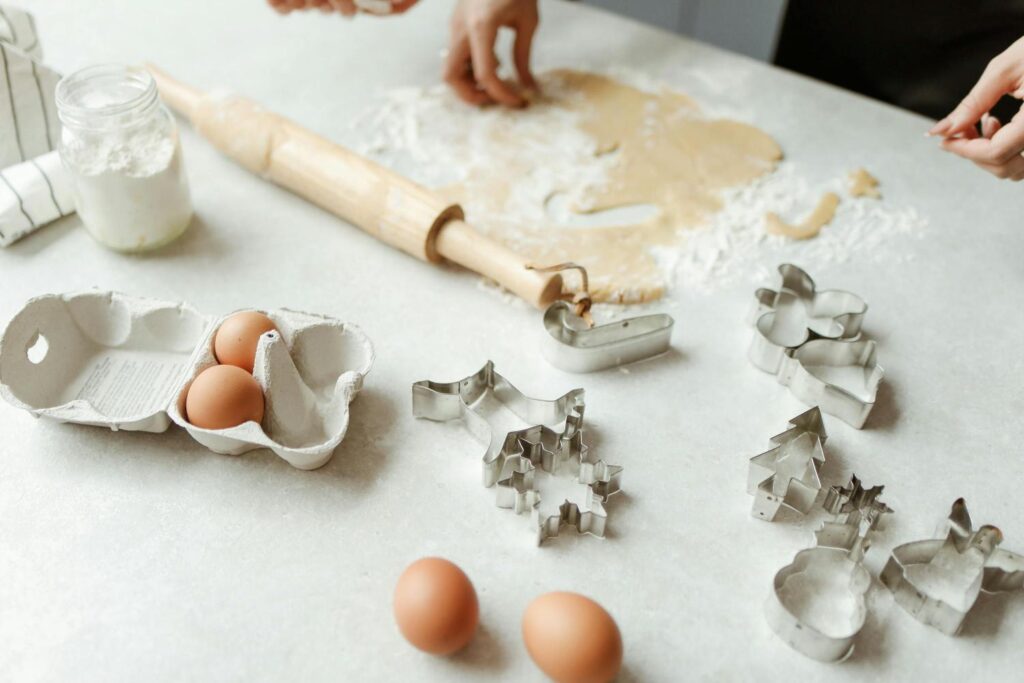
Rolling out the dough and cutting festive shapes is where sugar cookies turn into holiday magic. This step may seem simple, but some small adjustments can make all the difference between sticky frustration and perfectly shaped cookies ready for decorating.
Rolling Techniques: Provide tips on using flour to prevent sticking
- Lightly flour your surface: Sprinkle an even layer of flour on your countertop or rolling mat before placing your dough down. Too much flour can dry the dough, so use just enough to prevent sticking.
- Flour your rolling pin: Dust a bit of flour on your rolling pin as well. This stops the dough from catching and tearing as you roll.
- Roll between parchment paper: Want less mess? Sandwich the dough between two pieces of parchment paper. This eliminates sticking entirely and makes cleanup a breeze.
- Work quickly: Cold dough rolls out better but can warm up quickly. If it gets sticky, pop it back into the fridge for a few minutes to firm up.
Aim for an even thickness—about 1/4 inch is perfect for cut-out cookies. This ensures they bake evenly and stay soft in the center without becoming too crispy around the edges.
Using Cookie Cutters: Suggest Different Shapes for Christmas Themes
Here’s where the fun begins—choosing your cookie cutter shapes. For Christmas, the possibilities are endless! Classic shapes and creative ideas can make your cookie plate extra festive. Consider these options:
- Traditional Christmas shapes:
- Stars
- Christmas trees
- Stockings
- Candy canes
- Snowflakes
- Gingerbread men
- Unique additions:
- Reindeer or sleighs
- Santa hats
- Snow globes
- Cute holiday animals (penguins, polar bears)
- Holiday wreaths
For sharp, clean edges, dip your cookie cutters in a little flour before cutting into the dough. Press firmly but gently to avoid any tearing or stretching. And don’t forget to gather up your dough scraps, ball them together, and roll them out again to get the most out of every batch.
Get creative! Mixing a few whimsical shapes with classics can bring some fun personality to your platter of cookies. What’s more festive than a mix of Santa hats, snowflakes, and a playful polar bear?
Baking the Cookies
Once your dough is rolled, cut, and ready to go, it’s time to bring your sugar cookies to life in the oven. Small details can be the difference between undercooked dough and golden perfection during this step.
Oven Temperature and Time
For perfectly baked Christmas sugar cookies, preheat your oven to 350°F (175°C). This temperature is the sweet spot for achieving lightly crisp edges while keeping the centers soft. Baking at a lower temperature, like 325°F, can make cookies denser while going higher risks over-browning before the inside is done.
How long should they bake? Typically, sugar cookies need just 8 to 12 minutes in the oven. The exact time depends on the size and thickness of your cookies:
- Smaller shapes (thin cutouts): Around 8 minutes.
- Larger, thicker shapes: 10-12 minutes.
Keep an eye on your cookies as they near the end of the baking time. Since every oven heats a bit differently, they might be done a minute earlier—or need an extra minute.
Pro tip: Bake cookies one tray at a time on the middle rack for even heat distribution. Use a light-colored baking sheet or line it with parchment paper for the best results.
Checking for Doneness
How can you tell when sugar cookies are just right? Look for these visual cues:
- Lightly golden edges: The edges should be a shade or two darker than the center but not browned.
- Set centers: Gently touch the middle of a cookie; it should feel firm but soft, not wet or doughy.
- No puffiness: If the cookies have puffed up slightly during baking, they’ll settle as they cool.
Avoid baking until they “look” completely firm in the oven—cookies continue to cook slightly after removing them. Overbaking causes them to lose their soft texture and festive flavor.
If you’re someone who likes precision, you can also test doneness with an instant-read thermometer. Most cookies are ready when they reach an internal temperature of 200-205°F (93-96°C).
Once removed from the oven, let the cookies rest on the baking sheet for a few minutes to firm up before transferring them to a cooling rack. This step is key for preserving their shape and texture. Now, you’re ready to move on to the most exciting part—decorating!
Decorating Your Cookies
Decorating sugar cookies is where the magic happens! It’s your chance to turn simple cookies into edible works of art. Whether creating traditional Christmas designs or letting your imagination go wild, the right decorations take these treats to the next level.
Frosting and Icing: Introduce basic frosting recipes for decoration
Frosting and icing are the backbone of cookie decorating. They add flavor, texture, and that all-important festive appeal. Here are a couple of go-to options:
- Royal Icing: This is a classic choice for intricate designs. It’s made with powdered sugar, meringue powder or egg whites, and water. Royal icing hardens as it dries, so your designs stay intact—even if the cookies are stacked or gifted. To thin it for outlining or flooding (the smooth, shiny finish), add tiny amounts of water until it reaches the desired consistency.
- Buttercream Frosting: For a creamy, soft texture, buttercream is perfect. It’s made by whipping butter, powdered sugar, vanilla extract, and a little milk. It doesn’t harden completely, making it better for immediate snacking or cookies that won’t be stacked.
Want something simpler? Mix powdered sugar with a splash of milk and vanilla for a basic icing that hardens when dry. Add gel food coloring for vibrant designs, or leave it white for a classic snow-covered look.
Grab some piping bags or zip-top bags with the corner snipped off. You can also use squeeze bottles for easier control. Pipe outlines intricate patterns, or flood cookies with a thin layer of icing. Every drizzle and swirl is part of the fun.
Adding Sprinkles and Toppings: Suggest fun ways to decorate with sprinkles
Sprinkles and toppings are the easiest way to make cookies festive. They’re colorful, simple to use, and appeal to kids and adults alike. Here are some fun ideas:
- Classic Sprinkles: Use red, green, and white sprinkles to give cookies that unmistakable Christmas vibe. Apply them immediately after frosting so they stick securely.
- Colored Sugars: Dust sparkling sugar over wet icing for a shimmery, frosty finish. It’s perfect for snowflake or snowman designs.
- Candy Pieces: Add small candies like mini M&Ms or crushed candy canes for texture and bold colors. These work great for adding details like buttons on gingerbread men.
- Edible Glitter: This adds a dazzling effect to your cookies. Sprinkle it lightly over icing for a magical, snow-dusted style.
- Shaped Toppings: Look for festive shapes like stars, holly leaves, or gingerbread men. These are great for creating themed designs effortlessly.
Bonus tip: If you use royal icing, let the first layer dry before layering on details. This gives designs more depth and ensures they don’t bleed together. Decorate them with care—or not! It’s Christmas; imperfection adds charm.
Storing Your Cookies
After all the effort that goes into baking Christmas sugar cookies, you’ll want to keep them as fresh and tasty as the day you made them. Whether you’re indulging in just a few or saving some for later, proper storage makes all the difference. Here’s how to handle short-term and long-term storage to maintain that homemade goodness.
Short-Term Storage
Planning to eat your cookies within a few days? Keep them soft and fresh by storing them in airtight containers at room temperature. Here are the steps to follow:
- Cool completely: Always let cookies cool fully after baking; otherwise, trapped steam can make them soggy.
- Use the correct container: Choose a container with a tight seal, like a plastic or glass food container. Zipper storage bags work, too, in a pinch.
- Layer with parchment or wax paper: Place a layer of parchment or wax paper between each layer if stacking cookies. This prevents them from sticking or smudging any icing details.
Keep the container away from heat, sunlight, or humidity—cookies thrive best in a cool, dry spot. With these steps, your sugar cookies will stay fresh for up to three days.
Long-Term Storage
Want to enjoy those Christmas sugar cookies weeks later? Freezing is your best option. The freezer locks in the flavor and texture perfectly, provided you store them correctly:
- Prep your cookies: Cool them completely first. Avoid freezing freshly decorated cookies unless the icing has fully set—otherwise, it might smudge.
- Wrap individually or in small groups: Use plastic wrap to cover each cookie individually, or group 3-4 cookies together. This adds an extra layer of freshness protection.
- Place in an airtight container or freezer bag: After wrapping, put your cookies in a sturdy, airtight container or a resealable freezer bag. If using a bag, remove as much air as possible before sealing.
When ready to enjoy them, let the cookies thaw at room temperature for about 20-30 minutes. For frosted cookies, thaw them while still wrapped to avoid condensation ruining your designs. Frozen cookies can last up to three months with minimal loss of flavor or texture, making them a handy treat whenever cravings hit.
Easy Christmas Sugar Cookie Recipe for Rolling and Cutting

Easy-to-follow recipe, you’ll roll, cut, and decorate festive shapes to perfection.
Ingredients
- 3 cups all-purpose flour
- 1 teaspoon baking powder
- 1/2 teaspoon salt
- 1 cup unsalted butter, softened
- 1 cup granulated sugar
- 1 large egg
- 2 teaspoons vanilla extract
Instructions
- Cream Butter and Sugar: Use stand mixer, beat the softened butter and sugar together on medium speed. Mix until it’s light and airy. This process should take about 2-3 minutes.
- Add Egg and Vanilla Extract: Crack in the egg and pour in the vanilla. Continue mixing until everything is well combined.
- Combine Dry Ingredients: In a separate bowl, whisk together flour, baking powder, and salt. Slowly add this mixture to your wet ingredients while mixing on low speed. Keep mixing until you get an even dough—don’t overdo it!
Chilling the Dough
After mixing the dough, it’s essential to chill it. Why? Chilling helps firm up the butter and prevents the dough from spreading too much when baked.
- Split the dough into two portions.
- Flatten each into a disk shape, wrap in plastic wrap, and refrigerate for 1-2 hours. Don’t skip this step—it’s the secret to easy rolling and perfectly shaped cookies.
Rolling and Cutting Out Shapes
Once the dough is chilled, it’s time for the fun part—rolling and cutting! Here’s how to do it like a pro:
- Lightly flour your work surface or use parchment paper to prevent sticking.
- Roll out the dough to about 1/4-inch thickness. Even thickness ensures that the cookies bake consistently.
- Use festive Christmas cookie cutters (stars, snowflakes, trees) and press them into the dough. Flour the cutters to keep them from sticking.
- Transfer cut-out shapes to a parchment-lined baking sheet, leaving about 2 inches between them to allow for slight expansion.
Baking Instructions
Cooking sugar cookies is quick and easy. Set your oven to 350°F (175°C) and follow these steps:
- Bake cookies for 8-12 minutes, depending on their size and thickness. Smaller shapes may require less time, while thicker ones might take the full duration.
- Watch for the edges to turn lightly golden but not brown. Once that happens, they’re done.
- Let cookies rest for about 5 minutes on the baking sheet. Then, transfer them to a wire rack to cool completely before decorating.
Notes
For those in a rush, chilling the dough in the freezer for 30 minutes works too.
Let’s Get Baking!
Baking Christmas sugar cookies to roll and cut isn’t just about creating delicious treats—it’s about making memories. From mixing and rolling to decorating, every step adds to the holiday cheer. These cookies blend tradition, creativity, and festive fun perfectly.
Try this recipe and let the holidays come alive in your kitchen. Don’t forget to share your creations with family, friends, or even online! Whether it’s a simple star or an intricate Santa, your cookies will surely spread joy. Happy baking!
This blog post may contain affiliate links. If you click on these links and make a purchase, I may earn a commission at no additional cost to you. I only recommend products or services I use and believe will add value to my readers. Please note that I am not responsible for the content, privacy practices, or services of external sites linked within the blog post.

